So, you want a new site?
You’ve taken a look at your website recently and noticed that it’s not as functional or glamourous as it once was – the slider seems a bit dated,, and that long scroll design on your competitor’s site is looking pretty fresh. Your business has also changed a lot since you launched your site and its design is no longer meeting your business’s needs.
If you can spare the time and resources to push your business into these modern internet times, then congratulations! You might be ready for a site redesign. We’ll walk you through the basic process in 6 steps, as well as suggest some things you should consider along the way.
Step one: Get a quote
Chances are, you don’t have the resources in-house to do it all. You’re likely looking at outsourcing this project to professional web designers and developers. Most companies can do the whole process, but it can get expensive. Shop around for different quotes and, if it makes more sense cost-wise, consider sourcing portions of the project to different parties. For instance, maybe you love the design work of Agency X, but you don’t love their cost to make that design a reality. Agency Y’s development fees look feasible though! Agency X + Agency Y could equal the perfect solution for your needs.
It’s important to inform anyone you’re getting a quote from what your needs actually are. Otherwise, you might end up with a nasty surprise when costs start adding up (you didn’t tell your developer that you were also going to need a blog? Well, they can do it, “but it’s not within the scope of the initial agreement…”). Be up front, and give as much information as necessary so that you can get an accurate quote.
Some major things to inform about: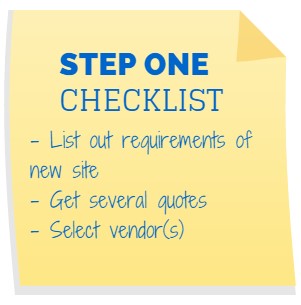
- Templates – how many templates will you need and for which pages on the site? For example, a home page, blog, image gallery, general content page, and contact forms all might require different templates if the design elements vary greatly.
- Content Management System (CMS) – what system will you require, and what do you want to be able to do? We recommend WordPress (WP) as it is one of the most commonly supported content management systems.
- Responsiveness – do you want your site to be mobile-friendly? Responsive/mobile-friendly designs means that your website will conform to fit the small screens of most mobile devices.
- Content – How many pages are you looking at? What kind of content are you supplying?
Step two: Kicking off!
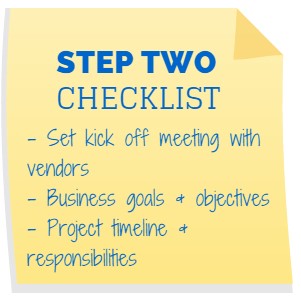
Now that you’ve selected your designer/developer, it’s time for the kick-off meeting. This is the best part of launching a website (outside of actually seeing it launch, of course), because everyone is excited and creative juices are flowing. This meeting should include anyone that will be involved in the project, such as designers, developers, project managers, IT people, SEO strategists, etc.
It’s important to make everyone aware of your business goals and objectives. Where do you see the business in 5 years? How will that affect what your online presence will be in that time, and will that affect the site’s growth capabilities? Chances are, you will have to redesign the site again around the 5 year mark, but you don’t want to render it obsolete in half that time if your business model is going to change drastically.
It’s also imperative to consider why you are redesigning. Is it just that you don’t like the look of your current site, or are your needs not being met by the current site? Consider what you want your users to experience, and what you want your business to achieve online. For instance, you might want people to primarily contact you online, so featuring contact forms and newsletter signups across your website is important.
You should also be breaking down the project into different parts so you can create a realistic timeline for everyone involved. Wanting to launch in two months and actually launching in two months are very different things. Likely your partners have other clients and projects, and determining each portion of the project and who is responsible helps everyone manage their workload appropriately. This will also help ensure that everyone is on the same page and aware of the project deadlines.
Step three: Time to design
The design process isn’t all pretty colours and flashy images. Before a designer even starts to put pen to paper (or mouse to screen), you and your SEO team will have to work out a site plan and architecture. Not every page will be at the same level of importance, and you will have to determine a hierarchy for the content on your site, this is essentially how your site will be structured. Consider which of your current pages will stay, which will be removed or added, and how you want those pages to interact with each other. Depending on how big your website is, this can be a huge process.
Here is an example of a simple site architecture visualization:
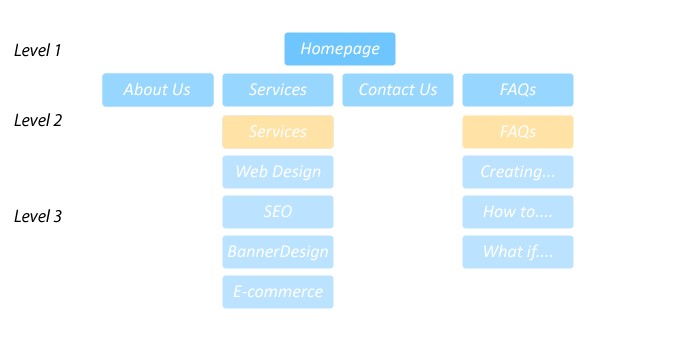
Based on this site architecture, the designer will come up with the wireframes which are like the blueprints of a website. The basic elements and layout will be outlined, so you will be able to visualize how the website will look and make changes before anyone has put too much time and effort into a foundation that you may dislike.
Really good wireframes have annotations which explain the interaction states like what a drop down menu would look like or what kind of content will be rotating on the home slider.
Here is an example of a wireframe with annotations:
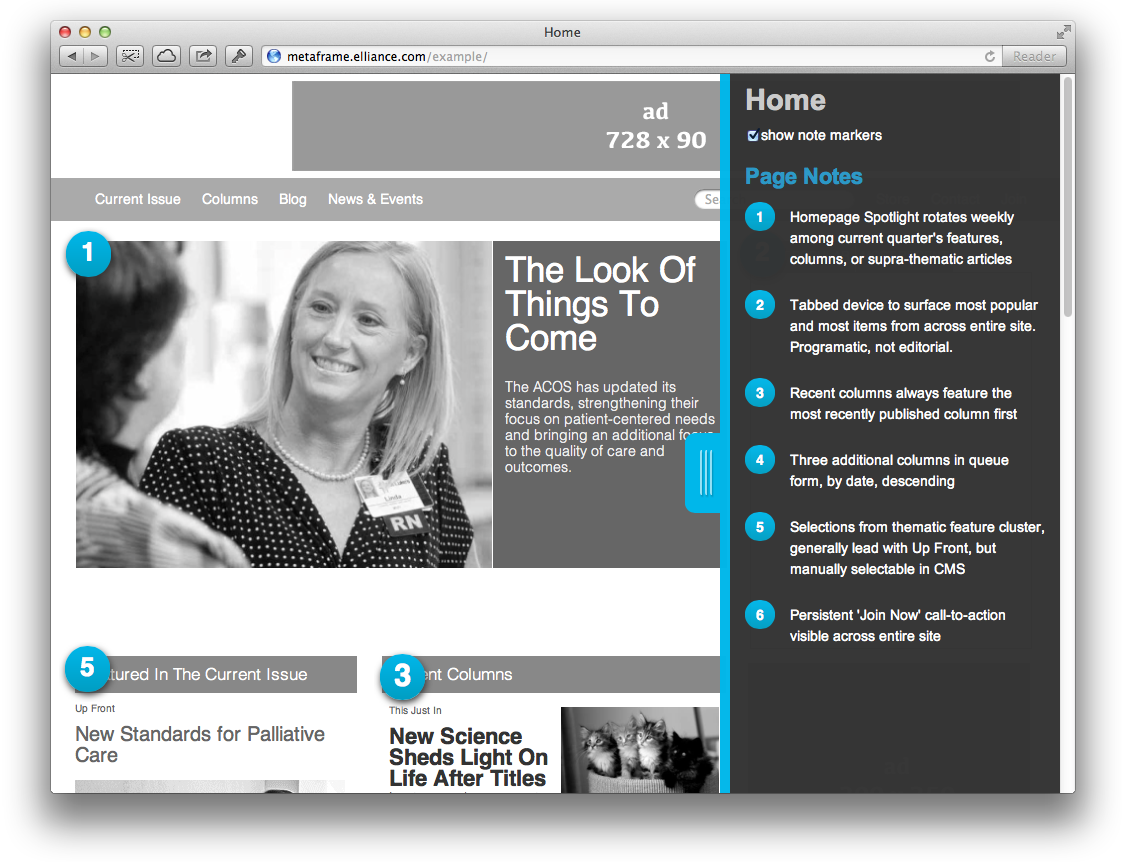
Source: aha.elliance.com
This would be a good time to say “Actually, I imagined the product navigation to be on the right-hand side”, or “This is exactly how I pictured the layout”. Once the foundation is laid, it’s not impossible to change things later, but it’ll likely cost extra to make major adjustments that could have been addressed earlier in the process.
 Also feel free to question some of the design choices being made, an experienced designer should be able to explain to you the rationale behind their design suggestions.
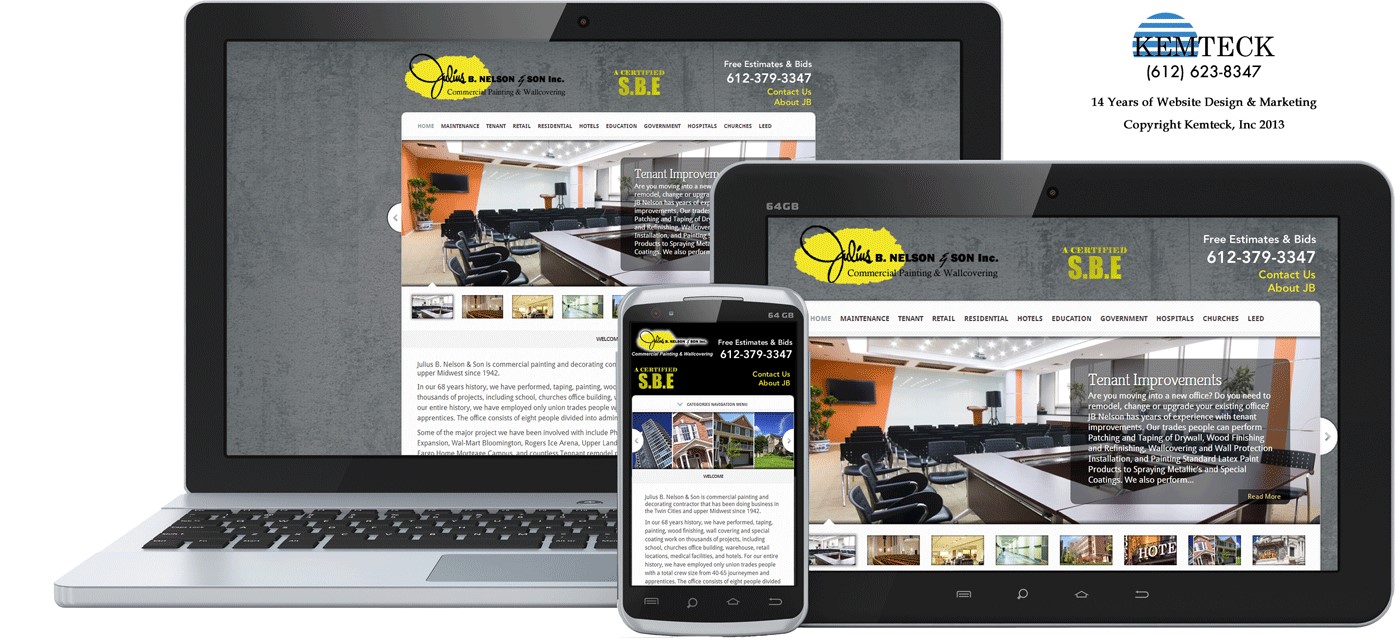
The design mockups are the last checkpoint before the website actually starts to be built. Your designer should have created designs for every template that you requested (e.g. what the homepage will look like, how this differs from the blog page, and also mobile mockups if that’s what you’ve asked for).
Here is an example of what different homepage design mockups look like on various devices:
Step four: Let’s get building
There are three major areas for you to think about as the developer starts to build the site: the front end, the back end, and the content in between.
The front end I’m referring to is the development site (or “dev” site), which is the area that a developer will use to, quite simply, develop and test the new website. The design mockups should start to come to life on this site, and you will be able to interact with the dev site as if it were live, without affecting the current site or traffic. The only people who should see this site are the ones with the login information – Google won’t be able to search for it, so you can rest easy knowing that any mistakes or bugs can be safely fixed in this area before the site actually goes live.
The back end is the Content Management System (CMS). In the most basic CMS, you will be able to add or edit content to your website. Depending on how much you want to change later on, that might be enough for you. You can ask your developer to create fields so you can manipulate any amount of information.
We recommend being able to change: page titles, H1 (the main heading on the page), body content (where you can tag H2s and H3s as well), and meta descriptions. There should also be an easy way for a user to insert images and provide an ALT tag and title for that particular image. URLs should be auto generated depending on where the user is created a new page – this also reduces user error and having inconsistent URL structures, floating child pages, etc.
And of course, we can’t forget the content in between. The design mockups will all have that wonderfully generic Latin language (“Lorem ipsum dolor sit amet…”) as filler text, and the dev site will show the same until content starts being input. Typically it is your responsibility as the site owner to create and edit content, and have it input on the dev site. If you’re lucky enough to have an SEO team at your disposal (hello!), then that content can be professionally optimized for search engines to crawl once the site goes live. Content is an area that you can start to consider and write (or have a copywriter write) very early in the process, as soon as you get an idea of the site architecture.
Step five: Pre-launch considerations
So the site is built, the content is on the site, we can go live now, right? Not quite…
One of the biggest things people forget when launching a new site is how search engines are going to react to it. Yes, your new site will most likely live at your old domain, but Google isn’t going to just know that there is a new site. A lot of your rankings will be affected if Google notices that all of your old content is suddenly missing or changed, and your site traffic could take a hit because of it.
A 301 redirect map is a spreadsheet with all of the page URLs of your current/old site, and all of the URLs for your new site. Some URLs may stay the same (i.e. your homepage URL is likely not going to change), but some may change or be removed altogether. Here is a quick tutorial and explanation on how to create this map, in case you don’t have an SEO team to do it for you. Once it’s complete, send it to the developer to implement around launch.
You likely already have analytics code on your current/old site, and are tracking traffic and data in some capacity. Make sure your developer puts the correct code in the new site around the time of launch so that you don’t lose valuable data during the transition.
Your developer and SEO team will be doing tests throughout this process, and your SEO team especially will be examining the site once the build is complete. The SEO checklist during this phase is quite lengthy, but in general we are making sure that the site functions properly on all types of devices, there are no errors or bugs, and no duplicate pages.
Step Six: Launch!
The most fun step is the last step – launching your site. All the grunt work is done, the developer has launched the site, and it doesn’t seem to be crashing. Great news!
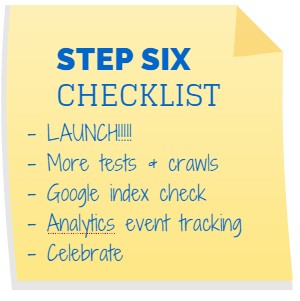
That being said, you’re not totally done. Similar testing that was done pre-launch should be carried out post-launch, with a couple more items to keep in mind. Most importantly, your SEO team during this phase will be making sure that Google and other search engines are indexing the new site, and not continuing to index the old site. As well, they will be setting up goal and event tracking for your new site so that the things you care about most (remember that business objective you had about people using your contact forms and clicking for emails?) are being looked at and achieved.
Things to keep in mind
- The first draft is almost never the final draft. Make sure you give feedback to your designers, developers and anyone involved throughout the process. Don’t be afraid to say something doesn’t look right – it’s your business and your site, and no one knows your audience better than you.
- If you do have any issues or changes throughout the entire site redesign process, bring them up as they become an issue. It might tack on extra time (and costs!) to the project if you stay silent for too long. No one wants to hear that you actually hate the whole site the day before it’s supposed to launch.
- Other than that, pat yourself on the back for a job well done but remember that there is no such thing as a “perfect website”. Your website should be updated on a regular basis, so don’t forget to keep reviewing, improving and growing your site often after launch.
Happy designing, friends!
Do you have web redesign in mind? Tell us about it!